Holy Cow!

Saturday, December 10, 2022

Random Christmas Cards

The final push for Christmas cards, made over the last seven weeks. We have enough for personal cards but everyone will be getting something different. With the kitchen renovation and now the downstairs bathroom remodel at our new home in TN, it's been difficult to get into a good creative swing. It'll be so good to start 2023 back doing my challenge of five Christmas cards a month... :)

Tuesday, October 25, 2022

Card Kits from Etsy...


I could not have been more pleased with these kits I purchased through a gal on Etsy back in August. I enjoyed putting them together and I truly love all the detail...

This one was my favorite. You make four in each kit. I purchased two kits because I knew I'd love to send them out...

This seems a very "Spring" card so they'll sit for awhile before they go postal...

Such a lovely "relax" card...

Monday, October 17, 2022

Various Happy Mails Turned into Cards


I joined a Facebook group a year ago that is all about Happy Mail. The past couple days, I've turned some of the contents into these cards...

This was an old wall paper strip that I cut into the two panels. I cut each with a stitched die, added bling, a sentiment and mounted on Cherry Cobbler SU paper... 

I added some splatters to the card on the left and I feel like I ruined it. The card on the right, I'm not even sure what it was before I used the stitch die on it. The woman who gave it calls it a Hunky Dory. Whether that's the brand or the bird is unclear. To me, this looks like a Meadow Lark...

The card on the left might be my favorite. The background was from a woman in Canada who's been playing around with her inks and stamps. The BUTTERFLY has been floating around my desk for two years. I'm not even sure where he's from anymore. The card on the right is another panel from the same woman in Canada; stitch died, add bling and twine, a sentiment and mounted on teal...

This was my background from the "Partials Box" and the center piece from a Happy Mail. I'm not usually happy with One Of A Kind cards (OOAK). I like making three of each but, these are simple and will probably be sent in the same Happy Mail group from which they were received...

Thursday, September 8, 2022

Random Cards from Random Places...

I need all these cards documented somewhere so here's what I've been up to lately...

A lot of these "parts" came from happy mails I have received from peeps in one of my Facebook groups. The peacock from Carol in Canada, I cut down and matted on gold and then purple. The background of the "THINKING OF YOU" and the "kisses" card came from Melanie in NC. The centerpiece on the top, the "THINKING OF YOU" sentiment and the sunflower are from other happy mails that I no longer remember who sent what. The "kisses" is a new to me die from Altenew...

These five were following a YouTube tutorial by Amy's Wares where she took an average patterned paper and used a 3D embossing folder to deeply emboss it. I tried it with a lavender paper and posted on my Instagram on September 4th (cindyrapson). I cranked out these five rather quickly with an embossing folder that looked like wheat called Linear Leaves. So very Fall to me... 

These were made from a kit I purchased on Etsy solely because of the fox images. I've got a friend who will LOVE receiving these...

It's been great replenishing a much depleted stash...

Monday, August 22, 2022

Does the DSP ever end????

My goodness!! Six months since I've done a blog post... yikes!! Anyway, we're all moved in to our new house in Tennessee. Not settled, but moved in. This past weekend, I finally found enough room in my future space to make these eighteen cards. My gosh how great that felt!! 

My goal was to try, really try to finish up one of these four Designer Series papers that I have. I didn't succeed but I'm very pleased to have a stash of birthday cards to use...

Another stab at the same DSP... 

I LOVED these the best! So very "Maine" to me...

Friday, February 18, 2022

April 2020 SheetLoad of Cards...


I didn't "find" SheetLoad of Cards by Call Me Crafty Al until February of 2021 but this one popped up on my YouTube feed and I LOVED it! Absolutely loved it! So, using a Stampin' Up Designer Series paper called Berry Delightful and the SheetLoad of April 2020,  I got to work...

This combo, I think, is my favorite...

These red bling from Gina Marie Designs are boom diggity! 

I loved the white bling as much as the red from Gina Marie Designs. All six of these cards helped fill a void in my stash. With moving to Tennessee on the horizon, my focus has been elsewhere. I'm very happy to replenish and get these cards postal... 

Friday, January 14, 2022

My old stand-by... Scrappy Backgrounds

I made about a dozen Scrappy Backgrounds over the weekend while the Ernman was watching football. THEN, on Monday and Tuesday, I turned these seven into cards. Now, my mission (should I choose to accept it) is to get these postal... well, all except that "pumpkin" one. That'll have to wait until fall. ;)

So, let me share my process. I start with this plastic canvas box the Ernman made me (shown in upper left) which sits just above my Genesis cutter. I put all strips from projects or pretty paper that I find interesting. Once that box is full, I organize the strips in front of me in rainbow order, than neutrals to the right and multi colors right in the front...

As I decide which color I want to make, ie: red, blue, black, orange, I incorporate strips of the same background paper INTO the piece. Working on typing paper, I cover the typing paper with adhesive so every strip I lay down has adhesive it will sit on. I start with one color in the top left corner going kitty-corner, about and inch or so down from the top. From there, going perpendicular, all pieces will butt up against it. Going back to the kitty-corner strip, I fill in until all typing paper is covered. I leave NO open space between pieces...
 
The two pieces on the right show what the piece looks like after the edges that hang over have been trimmed off. At this point, I dry emboss the piece which firmly cements those strips to the typing paper. In my opinion, this is what brings this Scrappy Background to a whole new level. Then it's mounted on a 3.75" by 5" colored cardstock matching what's in the piece. The two on the left show that piece mounted on a 4.25" by 5.5" (A2) cardstock. Six of the seven in the first photo were put directly on a white card base...

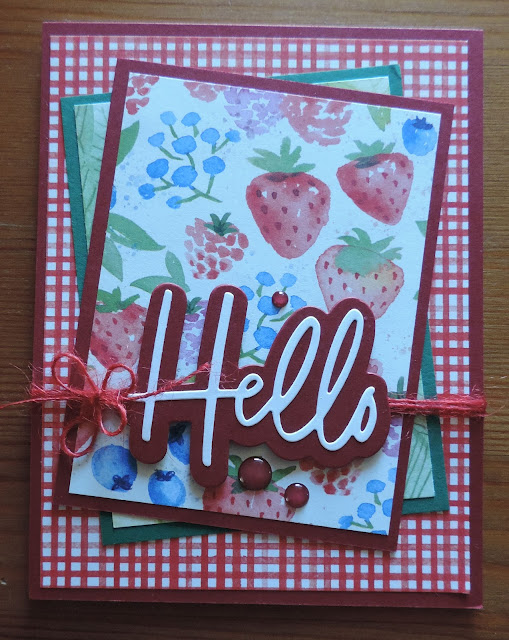
Before I put this one on the white card base, I added the orange twine, the pumpkin ephemera and bling. Many times, Scrappy Backgrounds just blow my mind. That's what happened with this creation. Many times, I leave the finished piece as is until I decide what kind of card I may need. A lot become "Hello", "Happy Birthday" or even "Merry Christmas". I've been making Scrappy Backgrounds for YEARS so if you search "Scrappy Background" for this blog, you'll find many. I hope you have as much fun with this as I do. Thank you for your interest...