Holy Cow!

Monday, December 31, 2012

The year in review...

I made 514 handmade cards for OWH
With help I sent 710 Any Hero notes from the students at MHS
I wrote 10 personal Any Hero notes
Total to OWH 1234

My first ever blog post was 1-14-12 (the blog was a Christmas gift last year), my last post was 12-31-12 (this one).  There were 75 posts.  I've had a total of 6116 views.  I have 23 followers, I follow 27...
 
I've taken 2 online classes, Creative Chemistry and Kickstart.  I've taken 4 classes at my LSS including a Brayering Class in NJ with Susan and Linda.  The 3 at Absolutely Everything were Spring and Die Cuts in March, Northwoods Stamps and Copics in May and Glitter Christmas and Copics in December.

Here's the tally of Christmas cards made that WAS on my side bar
 
2012 Challenge: Make 5
Christmas Cards per month

March - 6 Yay!
April - 9
May - 5
June - 11
July - 6
August - 7 Just barely!
September - 16
October - 26


Sunday, December 30, 2012

Quilted Card...

 
I was pretty excited about my productivity last night and today.  I followed a tutorial that I found on Pinterest (see here) and I created sixteen of these.  They are not however, all finished.  About eight still need the button and hat pin added but I'm on my way to New Jersey again tomorrow and won't have time to finish them until I return.  Of course, the picture (taken with my cell phone because my camera is still in Jersey) just doesn't do them justice...

I also made six Rainbow Candle Birthday cards, Sloppy Joes for Jersey (since there's no kitchen) and another rum cake to give as a gift tomorrow night... whew!  I'm tired!


Thursday, December 20, 2012

Featured Cardmaker...

I was the Featured Cardmaker last Friday on the Operation Write Home: Stars and Stamps Blog.  I was so touched to be honored!  However, I didn't share it on that day because we learned rather quickly of the horrors taking place in Newtown, CT.  Since tomorrow they honor another deserving cardmaker, I thought I'd share it today...  You can see it here.
 

Wednesday, December 19, 2012

Every heart beats true...

 
Another Midweek Throwdown and it's right up my alley!  A color challenge (red, white and blue) AND an "Any Hero" card.  I finally got to use a stamp set that I've had for a few weeks.  My last shipment to Operation Write Home for 2012 went out on Monday with the FINAL twenty-six cards from the students at Marblehead High School.  I'm free and clear!!  Until Zack decides to do this again in the Spring...
 
Products used...
  • Neenah Desert storm and Recollections red paper
  • Let Freedom Ring stamp set from Amuse Studio
  • White Gel Pen
  • Tim Holtz' Barn Door, Faded Jeans and Black Soot inks
  • Button from the zillions I have
  • Bead Cording

Monday, December 17, 2012

Cataloging...

I spent the morning cataloging my Tim Holtz Distress Inks onto this chart.  I LOVE this chart!  I found it here.  I printed it onto sturdy cardstock and began.  Starting with stamping the star on the appropriate square, cleaning off the stamp and then inking with the next color.  And since OCD me had to wash the stamp between each color so there would be no cross-contamination, it was time-consuming (but I did get my exercise between the bedroom and the bathroom...lol).  However, now that it's done, I only need to add when I have a new color.  And being the visual person I am, I LOVE seeing the colors in front of me.  Isn't it eye-catching?
 
Update:  Those of you looking for the label link, It is here. 

Sunday, December 16, 2012

From the heart for Newtown, CT...


Those of you who know me, know I am an Army brat and have lived in many places.  However, when my parents divorced, we landed in West Haven, CT.  I was there from 5th grade until I graduated.  Since they were my most formative years, I've always considered it where I "grew up".  This current national tragedy in Newtown, CT is about thirty miles away from there.  Since I will be just a couple miles from the Sandy Hook Elementary School the day after Christmas, I feel compelled to leave behind this card along with my prayers for a broken hearted community and nation...

 
UPDATE: On 12-26-12, I hand delivered this card to Newtown and left it with hundreds of thousands of other memorial gifts left behind...

Wednesday, December 12, 2012

Number 710...


This is one of the very first cards I admired that had been designed by my mentor, Barb.  I was in such awe!  While I visited her in California (now over two years ago... yikes! ), she taught me in person how to do this.  The one on the left is the one we did in her studio back then.  The one on the right is my current attempt with supplies I have now.  The flag is from the Close to My Heart set called Vintage USA and was one of the first things I asked for that Christmas.  My fiancé had a difficult time finding it, as it was discontinued.  However, if you know Ernie, you know he'd die trying.  Fortunately, he didn't die and I got the set for Christmas... :)

Since I only have twelve of the 710 Any Hero card fronts left to make for the notes from the students at Marblehead High School, I thought THIS card would be most appropriate!  You can see the original post HERE about Zack's campaign...

Monday, December 3, 2012

Rainbow birthday...


I originally saw this on Pinterest awhile back.  It appeals to my love of rainbows.  Recently, it was CASE'd by a fellow cardmaker on the OWH facebook page.  I thought I had to have a teardrop punch to do the candle flame.  It was Ronni who pointed out that the bird's wing on the Stampin' Up bird punch is the same shape.  THANKS Ronni!!  Now I've got an easy card to make when someone's birthday creeps up on me too quick... :)

Sunday, December 2, 2012

Glitter and Copics class...


Yesterday, I took a class at my LSS, Absolutely Everything, called Glitter, Copics and Die CutsIt was amazing!  I used products I had never used before like; shimmer sheets, release paper, adhesive sheets, micro fine glitter and glitter strips.  I learned techniques I had never tried before like; adding glitter to adhesvie sheets, burnishing, coloring ON glitter, and using stickers as accent lines.  The final result was just beautiful. 
It looks like stained glass...


Saturday, December 1, 2012

•♫♪ Chistmas Cards, oh Christmas Cards •♫♪

 
♫♪ Sending thru the land.  Adding cheer to all who receive and goodwill to man...♫♪ 
 
So, it paid off doing Christmas Cards from March thru now as I had enough to send to all our clients at Arrowhead too.  Last year it was a mad dash to get them done.  But look at this, December 1st, and all done!  Woo hoo!!
 

Thursday, November 29, 2012

Do you want that alphabetically?

 
For a LONG time those random leftover alphabet pieces from various sets have been making me crazy!  What to do with them?!!  Being OCD and rather frugal, I found I couldn't just throw them away.  No matter how hard I tried!  I can't tell you how many times they were actually IN the trash can only to haunt me from afar, thus having to be retrieved later and put back on my desk...

SO, also being a HUGE fan of the Scrappy Background, I combined the two.  This Scrappy Background is different from the tutorial on the Stars and Stamps blog but it's a Scrappy Background just the same.

The sentiment is one I did in WORD.  The phrase is one my fiancé says everytime I ask, "What's the matter with you?!!"  It's a standing joke in our household and works perfectly on this card with all the random letters...


Friday, November 23, 2012

Dusting off an old technique...

 
How about this for dusting off an old technigue for Our Daily Bread Designs Challenge for November... sewing on a card!  I've done this particular layout many times before (learned from my mentor over two years ago) but I really like it with the grays.  Many of the circles are punched from a Cloth, Paper, Scissors magazine.  That magazine has such vibrant colors, even in their advertisements...

Saturday, November 17, 2012

Cool, as in snowing...

 
Looking at my sidebar, I see I have sent 497 cards to Operation Write Home this year.  I can't let that lie... I need to break 500!  So, for my last box for 2012, I've made three of these.  Who knows how many more will make it into the box prior to shipping... :)


Wednesday, November 14, 2012

Midweek Throwdown...

 
For all that we are grateful for this month, here is my thank-you card for the Midweek Throwdown at OWH.  The leaves are punched from a Creative Memories punch and embossed with different folders to add depth.  The sentiment is by Ditto and was found in a dollar bin at Jo-Ann Fabrics and then popped with dimensionals.  Add some bling and scrap paper and voilà... a quick and easy card!


Tuesday, November 13, 2012

Monday, November 5, 2012

A little bit of this...


The four cards on the left were done yesterday from a kit that was included in the gift bag mentioned in the previous post (here) .  I LOVED that mustard embossed paper and it brings out the mustard colored ornaments on the tree.  Excellent combinations! 
 
The four in the middle are using up embossed folders and ribbon I received in a Christmas swap with Scrap to Treasure this past July.  The ornaments are by Stampendous and part of a HUGE after Christmas purchase from two years ago (I'm hoping I've learned my lesson and won't do that again... hahaha).  They are felt with adhesive on the back.  I put them over some scrap pieces and fussy-cut around them.  I am so happy to see them gone! 
 
And finally, while Ernie was up here during Hurricane Sandy, we worked on the reindeer card together.  We took ideas from a couple different cards we saw in a magazine and came up with this.  It was fun seeing ideas thru his eyes...


Sunday, November 4, 2012

Unbelievable Gift Bag...

 
This weekend Zack and I played host to one of his friends and her mom from Connecticut.  They brought a gift bag from Treasured Moments, an LSS near where they live.  I was stunned!  She had the owner take a look at my blog to get a "feel" for my style.  She then compiled these kits which include things like cardstock, 6" x 6" pads, ribbons, brads, stickers, embellishments, rub-ons and envelopes.  To say I was overwhelmed would be a grave understatement!  Thank you SO much Heather and Brittany...


Sunday, October 28, 2012

Hero Arts Card Kit...


I ran across this card kit by Hero Arts at my Target this past Friday.  Not only did it include two wood stamps, it included all the pieces for these eight cards.  I liked that the idea and supplies were already thought out.  So while Ernie was on a bus from New York to here Friday night, I made these.  This is definitely something I can and will CASE with my own supplies...


Sunday, October 21, 2012

September Card Kit...


This September kit from Simon Says Stamp was full of so many wonderful items to play with... I LOVED it!  As of today, I have completed 21 cards and still have some miscellaneous items to use on other projects.  I think I made my money back on this one... :)
 
 
The kit came with a 2" x 2" chalkboard which is too bulky to be mailed... but not too bulky for an Any Hero card... yay!  I loved the "look" of the chalkboard that I then recreated it with chalkboard paper from Michaels layered on craft paper.  I like the white stickers or white emboss on it as it makes it look like a real chalkboard...
 
 
It also came with a gift pouch.  I followed this tutorial to convert it to a card.  Since I put all my cards on a card back, I was able to make TWO cards instead of one... another yay!
 
Once again, I LOVED this kit!  Not only do I have almost a whole roll of washi tape left over (my first time using washi tape), a few scraps of paper and sticker letters but I have a fantastic set of acrylic stamps that I KNOW I'll be using over and over again...


Tuesday, October 9, 2012

Bargello Technique... again!

 
Another try with the Bargello Technique... I LOVE this one!  Maybe it's because where I have the sentiment is smaller than the snowman in the previous post.  You see more of the design...


Saturday, October 6, 2012

World Card Making Day...

 
Greetings Bloggers! I hope you are having more fun than you can stand and getting all kinds of great inspiration from everyone's blog.
 
When I was trying to decide what to do for this event, I stumbled onto this tutorial on Split Coast Stampers... it's called the Bargello Technique. It caught my eye because it uses up scraps AND makes a rather unique background. I goggled "Bargello" and learned that it is a technique used in needlework and quilting. It translates beautifully into cardmaking, don't you think? I CASE'd the layout from the card on the tutorial and had to find a sketch that it could fit under. I think Sketch #9 translates loosely... 
   
 
I did add a step between 6 and 7 where I dry embossed the whole piece before adding the embellishments and adhered to the blue card stock.  I felt it gave the whole piece added dimension.  The folder had snowflakes keeping with the whole wintry feel.  I LOVE this technique because you can use up some more of your scraps!  I don't know about you but no matter what project I do, I end up with more scraps than I used in the project! 

I think even the Scrap Wrangler would like this technique.

I'm just sayin'... :)
 

Friday, September 28, 2012

August Card Kit...


These are from the Simon Says Stamp monthly card kit for August. Yes, I know it's September but I am not the quickest draw in the west. I only made two types of cards from the kit of possibilities because I couldn't find the corresponding videos on the website. That's not because they aren't there. It's because I am the WORST navigator of the web!! BUT... I still loved making these cards!

What is really great about these kits (this was my first btw) is that it gives you an opportunity to use products you might normally walk on by. That would be the case with these flowers. They are velvet and are made by Maya Road. I wouldn't have given them a second look in the store but they really work on this layout. Also in the kit was some rick-rack. That was SO FUN to work with and I loved the effect. I've made a dozen cards and counting so far... woo hoo!! The kit also includes a set of acrylic stamps that I can continue to use on other projects. So, for the money, it is a great resource for stepping out of your comfort zone and trying new things...

Wednesday, September 26, 2012

Christmas card junkee...


These are all made from Scrappy Backgrounds... my absolute favorite way to use up scrap strips.  In the above cards, I only used Christmas patterned paper and reds, greens, golds and whites.  I am desperately trying to use up old Christmas supplies.  I am not allowing myslf to purchase another Christmas item until HALF, yes half, this current stash is gone!! 


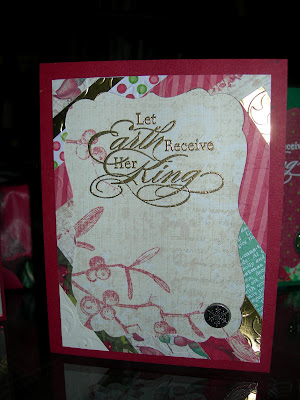
But, THIS is the pièce de résistance!  I took a Scrappy Background and die-cut a label with a Spellbinders Nestabilities.  I ended up with two pieces, the label and the frame.  I took the frame and put a piece of light patterned Christmas paper behind it and heat embossed the sentiment in gold.  I did two others like this (seen in the above photo) but heat embossed with white.  I absolutely LOVE this!  In the lower right corner, I used an embellishment from Close to My Heart.  Now once I perfect what to do with the label piece, I will have a never-ending use for my Scrappy Backgrounds... :)  I also get to add 10 more Christmas cards to September for my personal monthly challenge seen on the side bar...

Tuesday, September 25, 2012

To Travis...

 
These five cards are being included in my friend Diane's first care package to her son who is being deployed to Oman next month.  Travis Dancewicz is currently stationed in Hawaii with the Air Force but will be serving a six month tour abroad.  Recently married, his new wife will return to New Hampshire to be close to family while he is away.  Diane, who has done my nails for almost twenty years, will be sending care packages which I hope to include a set of cards like these for each shipment...


Thursday, September 20, 2012

Midweek Throwdown...


Here's my entry for the Midweek Throwdown Color Challenge over on the Stars and Stamps blog.  It's been a LONG time since I've done a challenge.  This challenge was to make a red and green card.  This also fullfills my personal challenge to make at least five Christmas cards a month (see side bar).  At least this month I have LOTS of days to spare... none of that last minute stuff!  ...lol 
 

Tuesday, September 11, 2012

Preliminary Card for Jessi...

 
A couple things you can't see in this pic Jessi...  1.  The ink of the feather is darker and 2.  There is a fine glitter on the feather itself.  I can send one to you today, in the mail, and you can see it up live and personal if you'd like... 


Thursday, September 6, 2012

More from the same 6" x 6" pad...

 
Just so there is a visual log, these are the final scraps used from the 6" x 6" pad that inspired this post.  That makes a total of TWENTY cards that came from one pack.  I find that so motivating!  Whenever I'm stuck, I'll just pick up a new 6" x 6" pad and get ready to roll!


Monday, September 3, 2012

Just a note...


I'm CASEing this card from Sherry who made a few of these for her sister's birthday.  I thought it was so elegant looking that I needed to try it myself.  This is mounted on white which does not show up well in this picture.  Hummm, maybe it's time to start taking pictures instead of scanning?

Friday, August 31, 2012

Under the wire...

 
I just finished my Christmas Card Challenge for August with three hours to spare (see side bar)... woo hoo!!  With all that's been going on this month in my personal life, this challenge took a back seat.  BUT, because I never quit... I had to get working FAST, before August disappeared. 
 
Using the new found knowledge that pads of paper are color coordinated, I took ALL of these from a 12" x 12" pad I purchased two Christmases ago after the holiday called Yuletide by K & Company.  The blingie thingy's are something Sherry sent me in a swap... they are pretty cool!   Sentiment is from a Stampin' Up set.
 
Merry Christmas everyone!
 

Wednesday, August 29, 2012

Following a Tuesday Tutorial...


The Tuesday Tutorial over on the Stars and Stamps blog yesterday was a lesson on turning one 6" x 6" pad into several cards.  When I first saw this by Kristie a few months ago, I gave it a shot with a couple pages from an existing pad.  The couple I did came out great!  It was enlightening to learn that all the papers in such a pad are color coordinated... how great is that!  I always wanted to try to do a whole pad and I took the opportunity today to do just that.  This pad is called "World Traveler" by Teresa Collins.  I spent hours and hours doing these.  The final total was seventeen cards.  And if I wasn't so tired right now, I'm sure I could make a few more with the scraps that are left...

Saturday, August 25, 2012

A little bit of this...

 
Sometimes I surprise myself...
 
This card is a combination of a couple other projects.  A little bit of this and a little bit of that and it came together so well.  I wish I'd had enough of the red paper to layer between the patterned and brown outside layers but I only had enough leftovers for two of these.  However, if I received this in the mail, I'd be delighted... 
 

Thursday, August 23, 2012

Happy Halloween...

 
This card came to me in a dream last Holloween... scary, eh?!!  This is one I designed myself.  Creating from scratch is not my forte.  I am usually the "Queen of CASEing"... lol.  So, when I thought this out from start to finish, I was very proud of myself...
 
How did I do this, you ask?  I started with watercolor paper since it's one of my favorite mediums for it's weight and texture.  I distressed with Tim Holtz' spiced marmalade distress ink and then dry embossed with the Stampin' Up web folder.  Using the vintage photo distress ink, I lightly distressed over the web to help it stand out.  A distress tool is used around the edges.  The sentiment is heat embossed with black ink and clear embossing powder and popped with dimensionals.  I made a dozen for my current box to Operation Write Home which will be shipping in a couple days...
 

Tuesday, August 21, 2012

Red and yellow flowers...


I found this cute little packet of red and yellow flowers in the dollar bin at Michaels several weeks ago that I thought would make a cute card.  I put them in my stash until an idea would come.  After Susan Hiles' cardmaking party a couple weeks ago (hilighted in the previous post), an idea took shape.  I CASE'd her layout on one of her kits, added the yellow paper from a stack she gave me that night and created this.  The red paper and bling are also from Michaels.  I used some Tombow Mono Liguid Glue on the jute, which are the stems of the flowers, and quickly ran into problems.  For one, I used too much, so it stuck everywhere including my fingers as I was trying to keep the stem in place.  If that had been video taped you'd all be in stitches.  Secondly, when it dried, it dried tacky.  So, my creative friends on the OWH facebook page guided me to correct my errors.  For problem #1, they said use less glue and get an adheshive eraser for removing excess on the paper.  For problem #2, use baby powder applied with a brush to make the stem no longer sticky.  Both worked.  I am always amazed at how extremely helpful everyone is in sharing their knowledge and secrets.  It makes this hobby an easy one to do with a full encyclopedia always at my fingertips... :)
 

Sunday, August 12, 2012

Productivity...


Linda and I joined Susan Hiles' card making group in Whippany, NJ last night where we assembled card kits to be sent to Operation Write Home.  I'm not sure we assembled as many card kits as Susan had ready for us but between the yip-yapping, snacking and coffee we sure had a blast!  However, I'm not sure coffee at 7pm was my smartest idea... :)


Saturday, August 4, 2012

To all the little boys...


OMGosh!!  These came out better on paper than they did in my head!

I've wanted to make a card for a little boy for awhile but haven't had any appropriate supplies or ideas.  I put out a request for a "truck" on Scrap to Treasure and received these from Rachel Guerrero!  Thanks Rachel!  Here's what I did with them.  I thought by putting toy type items in the truck bed, that would make it more boyish then manish... was I right?

The "street" is part of a sticker set I have had since the early ninties when I was going to make a scrapbook page using them for my little boy.  THAT little boy is now 27... how the HECK did time get that far ahead of me?  Well, since they never became the scrapbook page I had in mind, why not this?!!

Thursday, August 2, 2012

More Scrappy backgrounds...

I may be the biggest fan of the Scrappy Background from the OWH Stars and Stamps blog.  I have used it more times than I can count.  However, I have switched it up a bit by using different size strips and adding prints with solids.  It gives a more eclectic look, I think (my middle name, btw).  Here are some examples of what I've done...


In the first example, I made the sentiment part of the scrappy background.  Interesting effect, don't you think?  The sun I hand cut since I don't have a punch or die of a sun.  The second example, I threw in some light colors for contrast and popped the sentiment with dimensionals.  In the third example, you'll see under the "celebrate" sentiment some other words.  They are leftover stickers from a set that I just didn't know what to do with.  I thought they worked well here and not in my stash...


The example on the left, I have used only solid colors and the example on the right only prints.  The prints are from the same 6" x 6" pad so they match perfectly.  If you are doing some of this technique yourself, don't forget to emboss.  It really adds such dimension to the card.  As I said, I use this technique frequently.  Whenever I notice that I'm accumulating too many scraps of one color... it's time to do the scrappy background... :)

Thursday, July 26, 2012

You send me soaring...


I tried doing this card yesterday and it was sending me into orbit (get it... kite... orbit... geez I crack myself up!).  Anyway, first I couldn't find the tutorial anywhere.  And I'm not the best navigator of the internet.  So, I posted a request on the OWH facebook page and it didn't take long for someone to respond.  It was part of the Scrap Wrangler video... duh!  Second, I didn't have a scoring board so when I folded to make the lines, they weren't straight which caused their own headaches.  Third, my paper cutter is in desperate need of sharpening... again.  So, after tossing yucky kites all over the room last night, I gave up until today.  First thing I did this morning was buy a scoring board by Martha Stewart from Michaels with my 50% off coupon... yeah!!  I also purchased some colorful papers that seem kid friendly to me.  And tomorrow, on my way out of town, I'll drop off my cutter to be sharpened.  It's amazing what a new day can do for you... :)